


[ad_1]
You can quickly link a flash drive, SD card, thumb drive, electronic camera, USB drive, USB stick, memory stick, picture stick, as well as various other sort of outside storage space with your iPad. When done, you can relocate data in between the outside drive as well as your neighborhood iPad storage space (or iCloud Drive).
In this tutorial, we’ll share whatever you require as well as reveal you just how to utilize flash drives on iPad.
This overview relates to all iPads, consisting of the iPad mini as well as the effective iPad Pro, as well as it collaborates with all current variations of iPadOS.
What you need
Besides your iPad, you will certainly require either:
- a suitable flash drive with Lightning or USB-C adapter, or
- a Lightning or USB-C center, or USB adapter to link any type of routine drive
We do use a couple of suggestions for every of these devices listed below.
Crucial: The USB drive you intend to link to your iPad should have a solitary dividers, as well as it ought to be formatted as APFS, exFAT, FAT, or FAT32. Many drives are formatted in among these documents systems. Yet in situation it’s something else, you can utilize your Mac or computer to style them in among the stated documents systems.
Just how to link an exterior drive to iPad
1) Make certain your iPad is properly billed.
2) Wake your iPad most likely to the Residence Display.
3) Plug in your thumb drive with a suitable USB-C or Lightning adapter to your iPad’s billing port. You can likewise connect in a USB-C or Lightning center to your iPad and after that link a normal USB flash drive to it.

4) Now, open up the Apple Files app on your iPad.
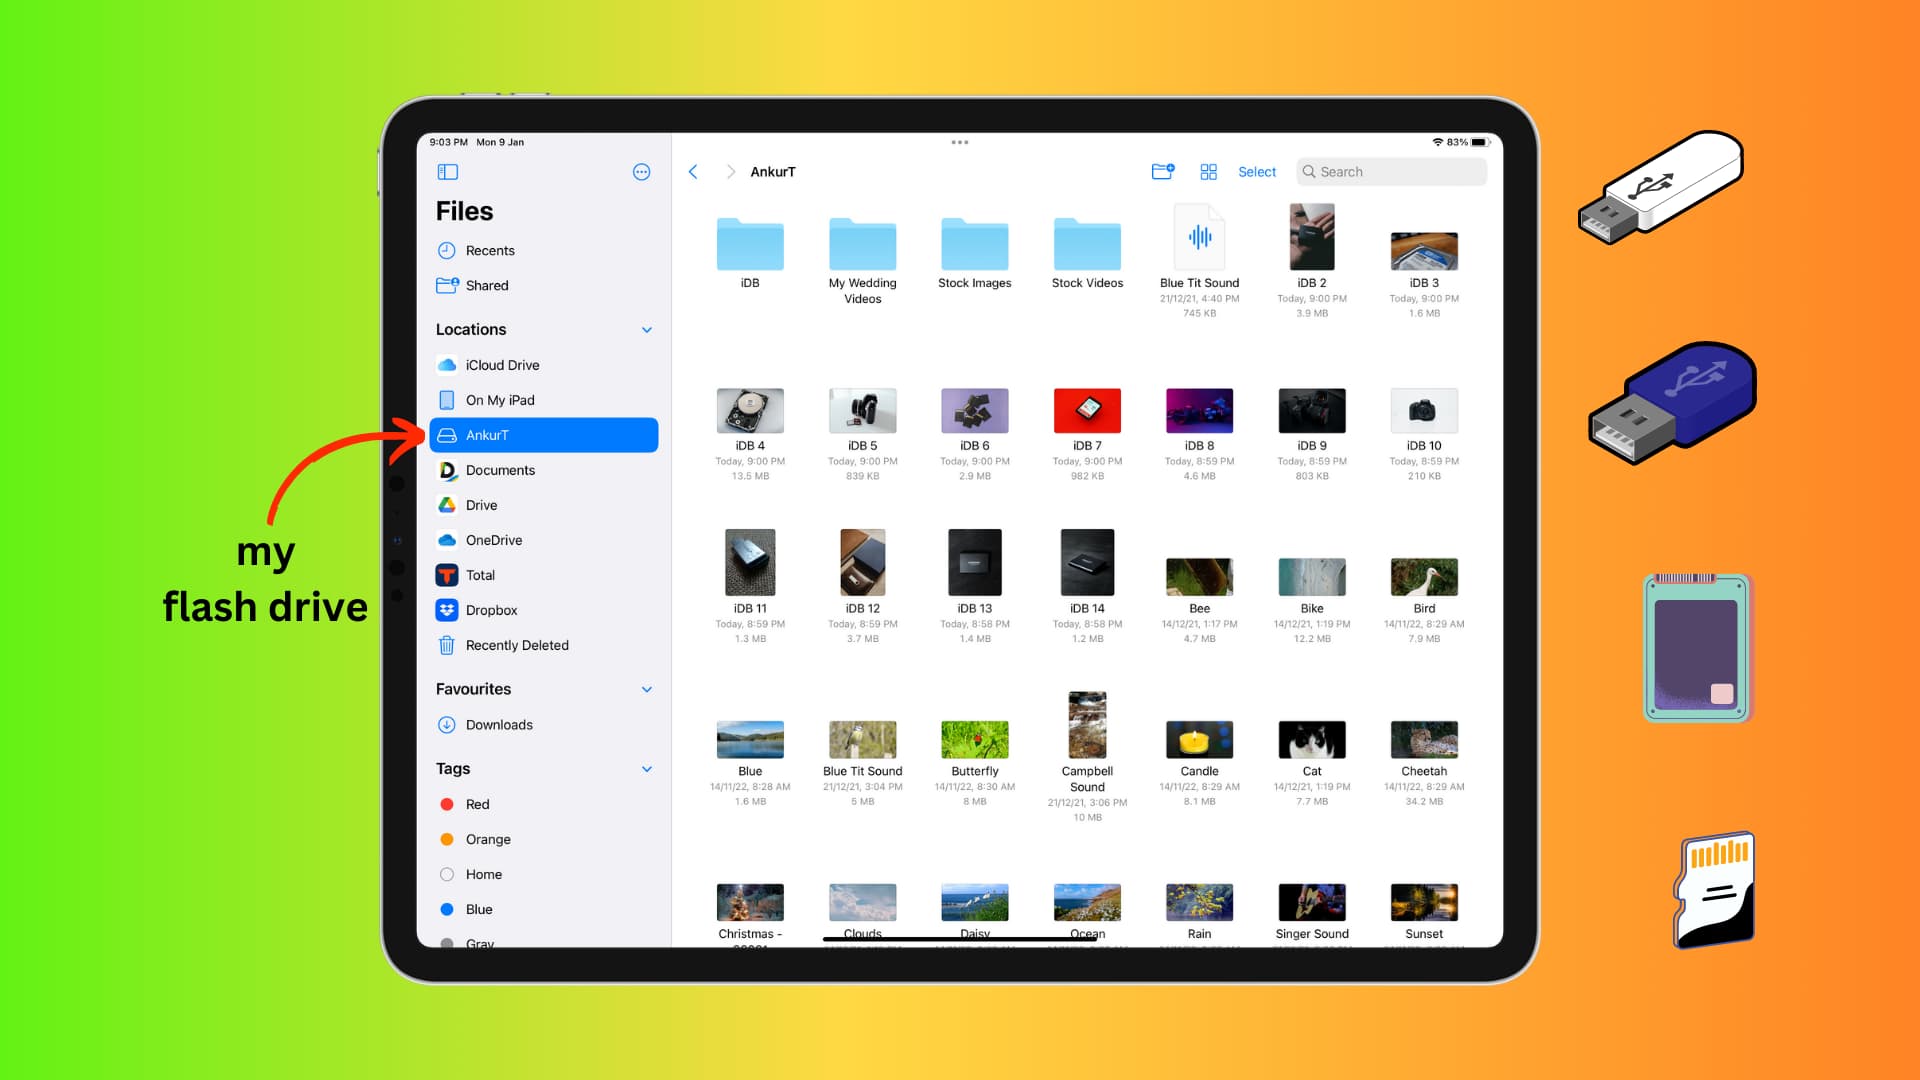
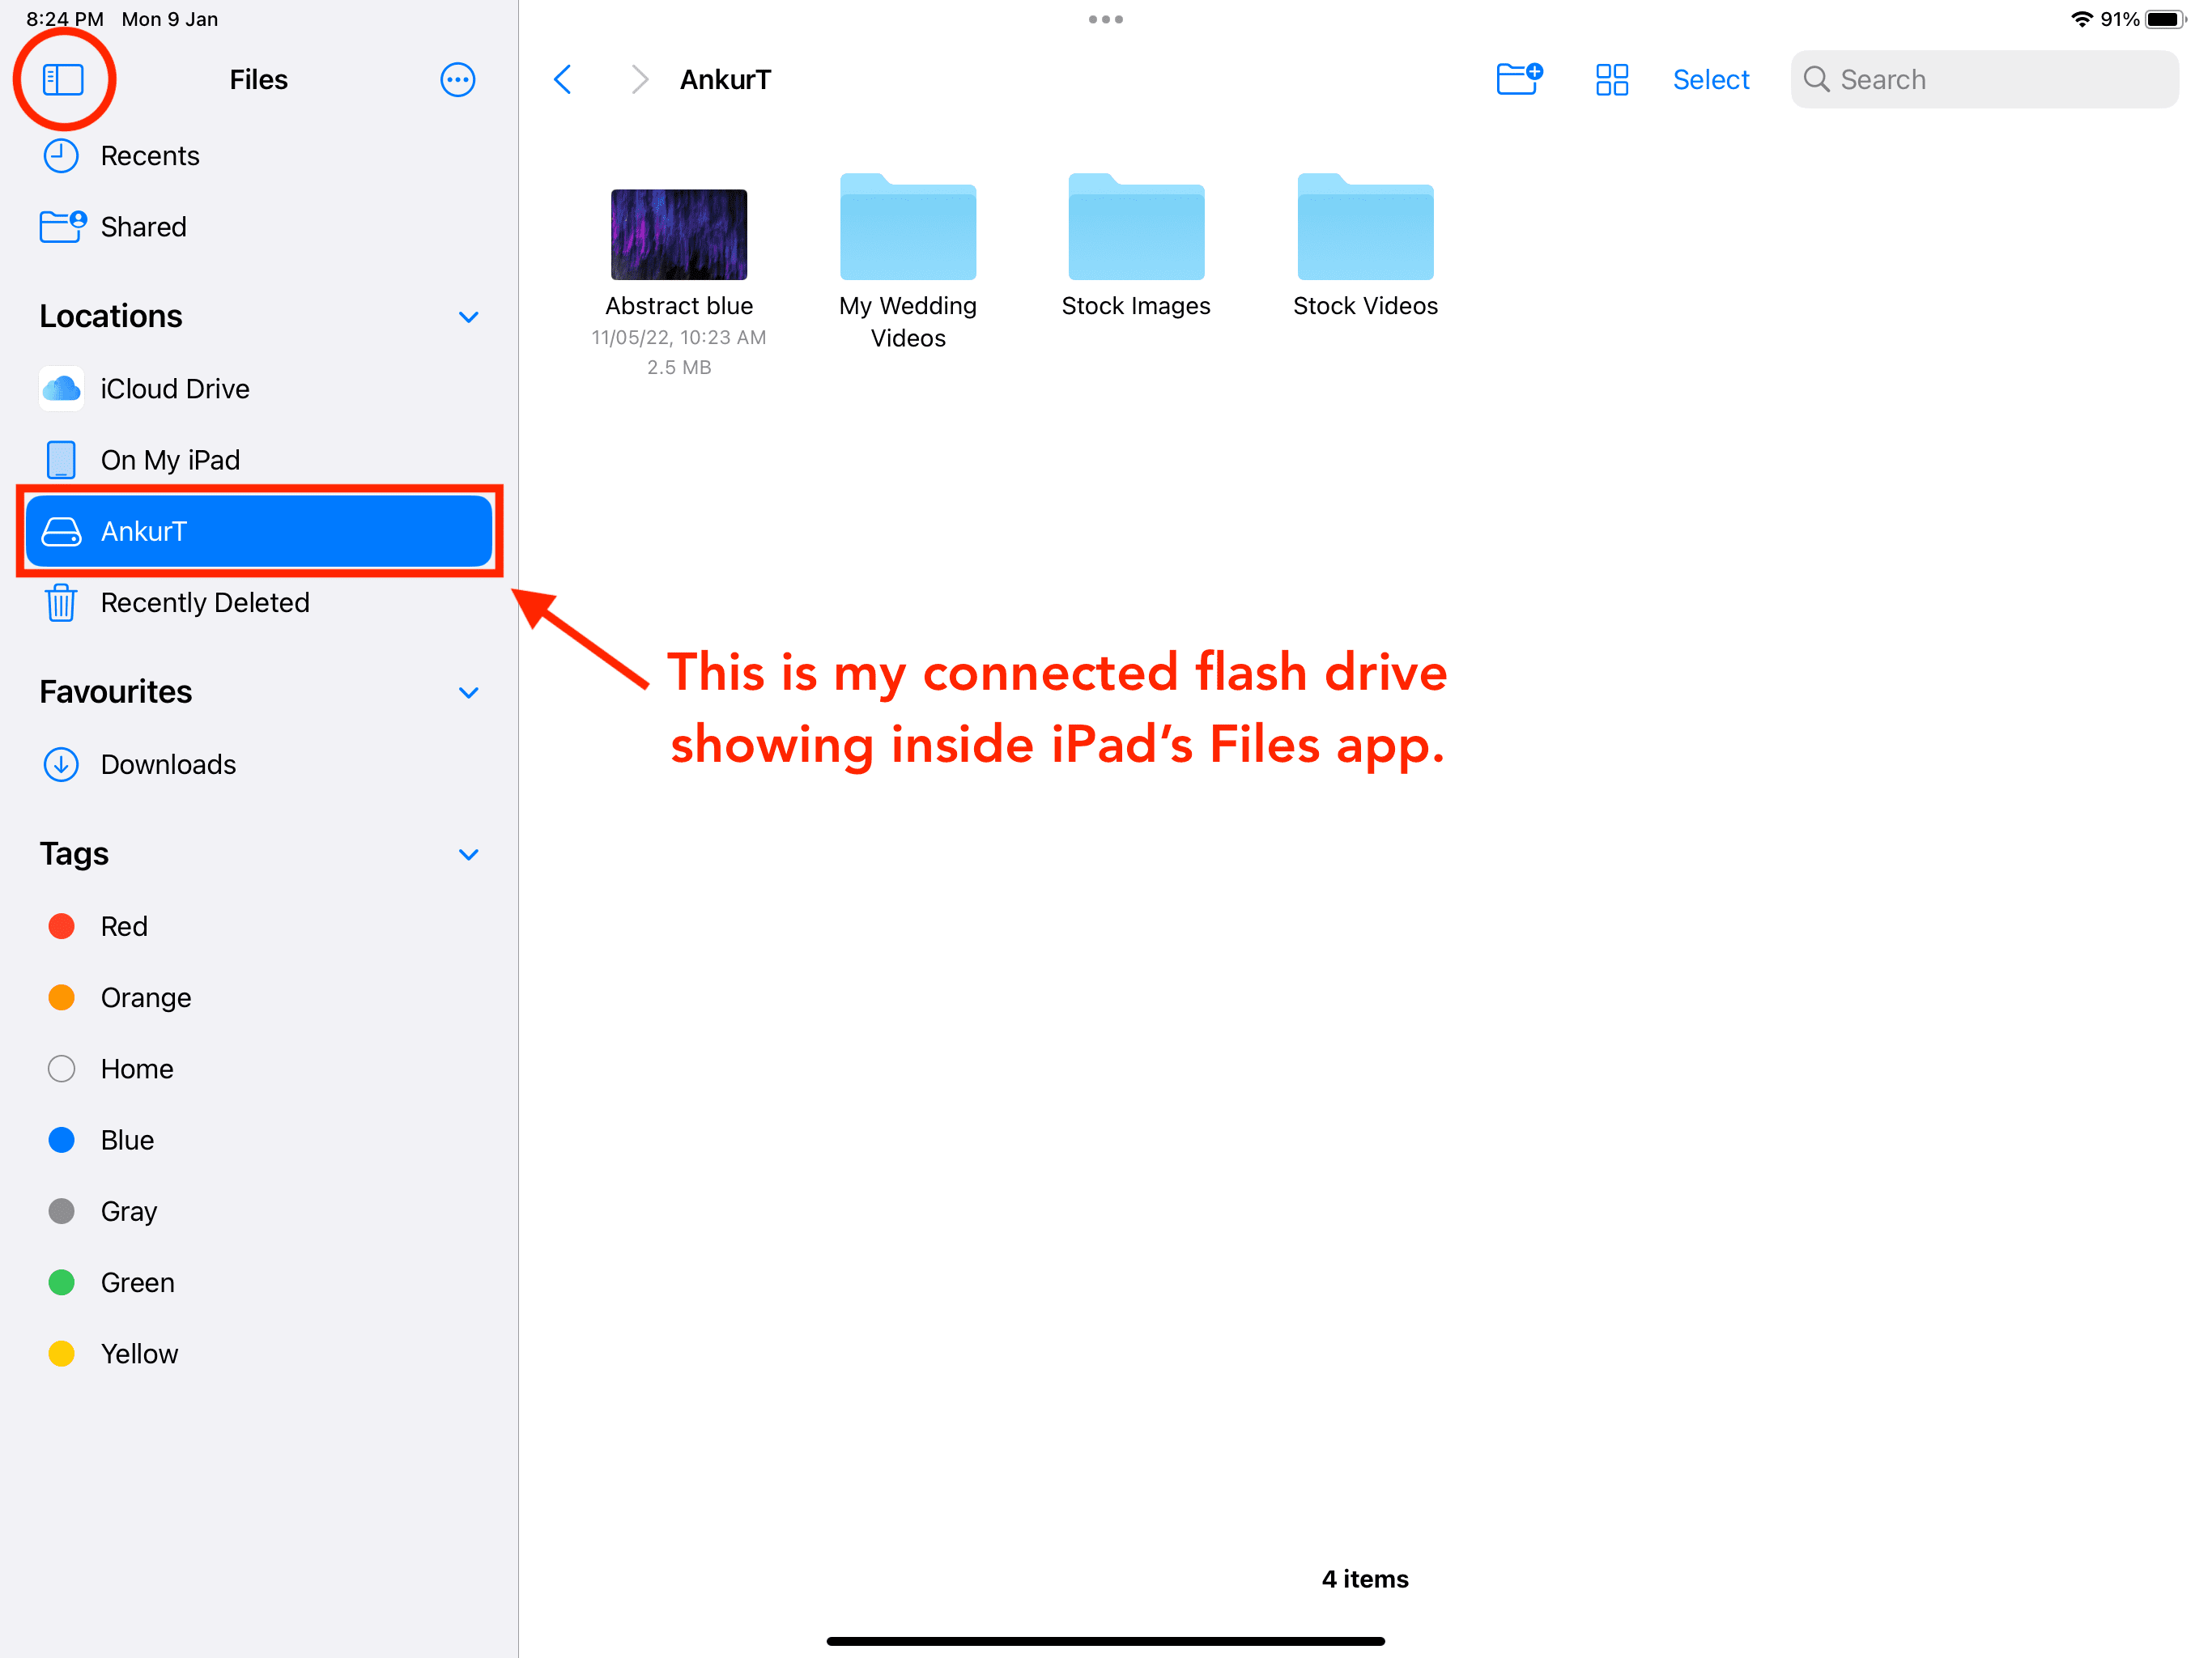
5) You’ll see the linked drive in the left sidebar under the Locations heading. If you do not see the sidebar, touch the sidebar icon from the leading left.
6) Tap the drive name to access its data.
Troubleshooting: Are you wanting to link a substantial disk drive?
I linked my 500 GB rotating outside hard drive (HDD) to my iPad Pro (M2 chip), as well as it functioned flawlessly.
Nonetheless, some big hard disk drives require substantial power to function. Your computer system can quickly power these drives, yet your iPad might not. In this situation, you’ll need to utilize a powered USB center. The powered center will certainly give the called for juice to the disk drive as well as likewise link it to your iPad.
Currently, allow’s see just how to utilize the linked drive on iPad for documents transfers, modifying, as well as playing the media.
Open or play media saved on the outside drive
With a faucet, you can quickly open up photos, video clips, PDFs, and so on, inside the Documents application. Nonetheless, it might not have the ability to open up some data. Because situation, if you have actually an application downloaded and install on your iPad that can, the Documents application will certainly reveal ‘Open in that application name.’

Replicate data from the outside drive to iPad
1) Select the linked USB drive from the left sidebar of the Data application.
2) Go to the place or folder that has the data.
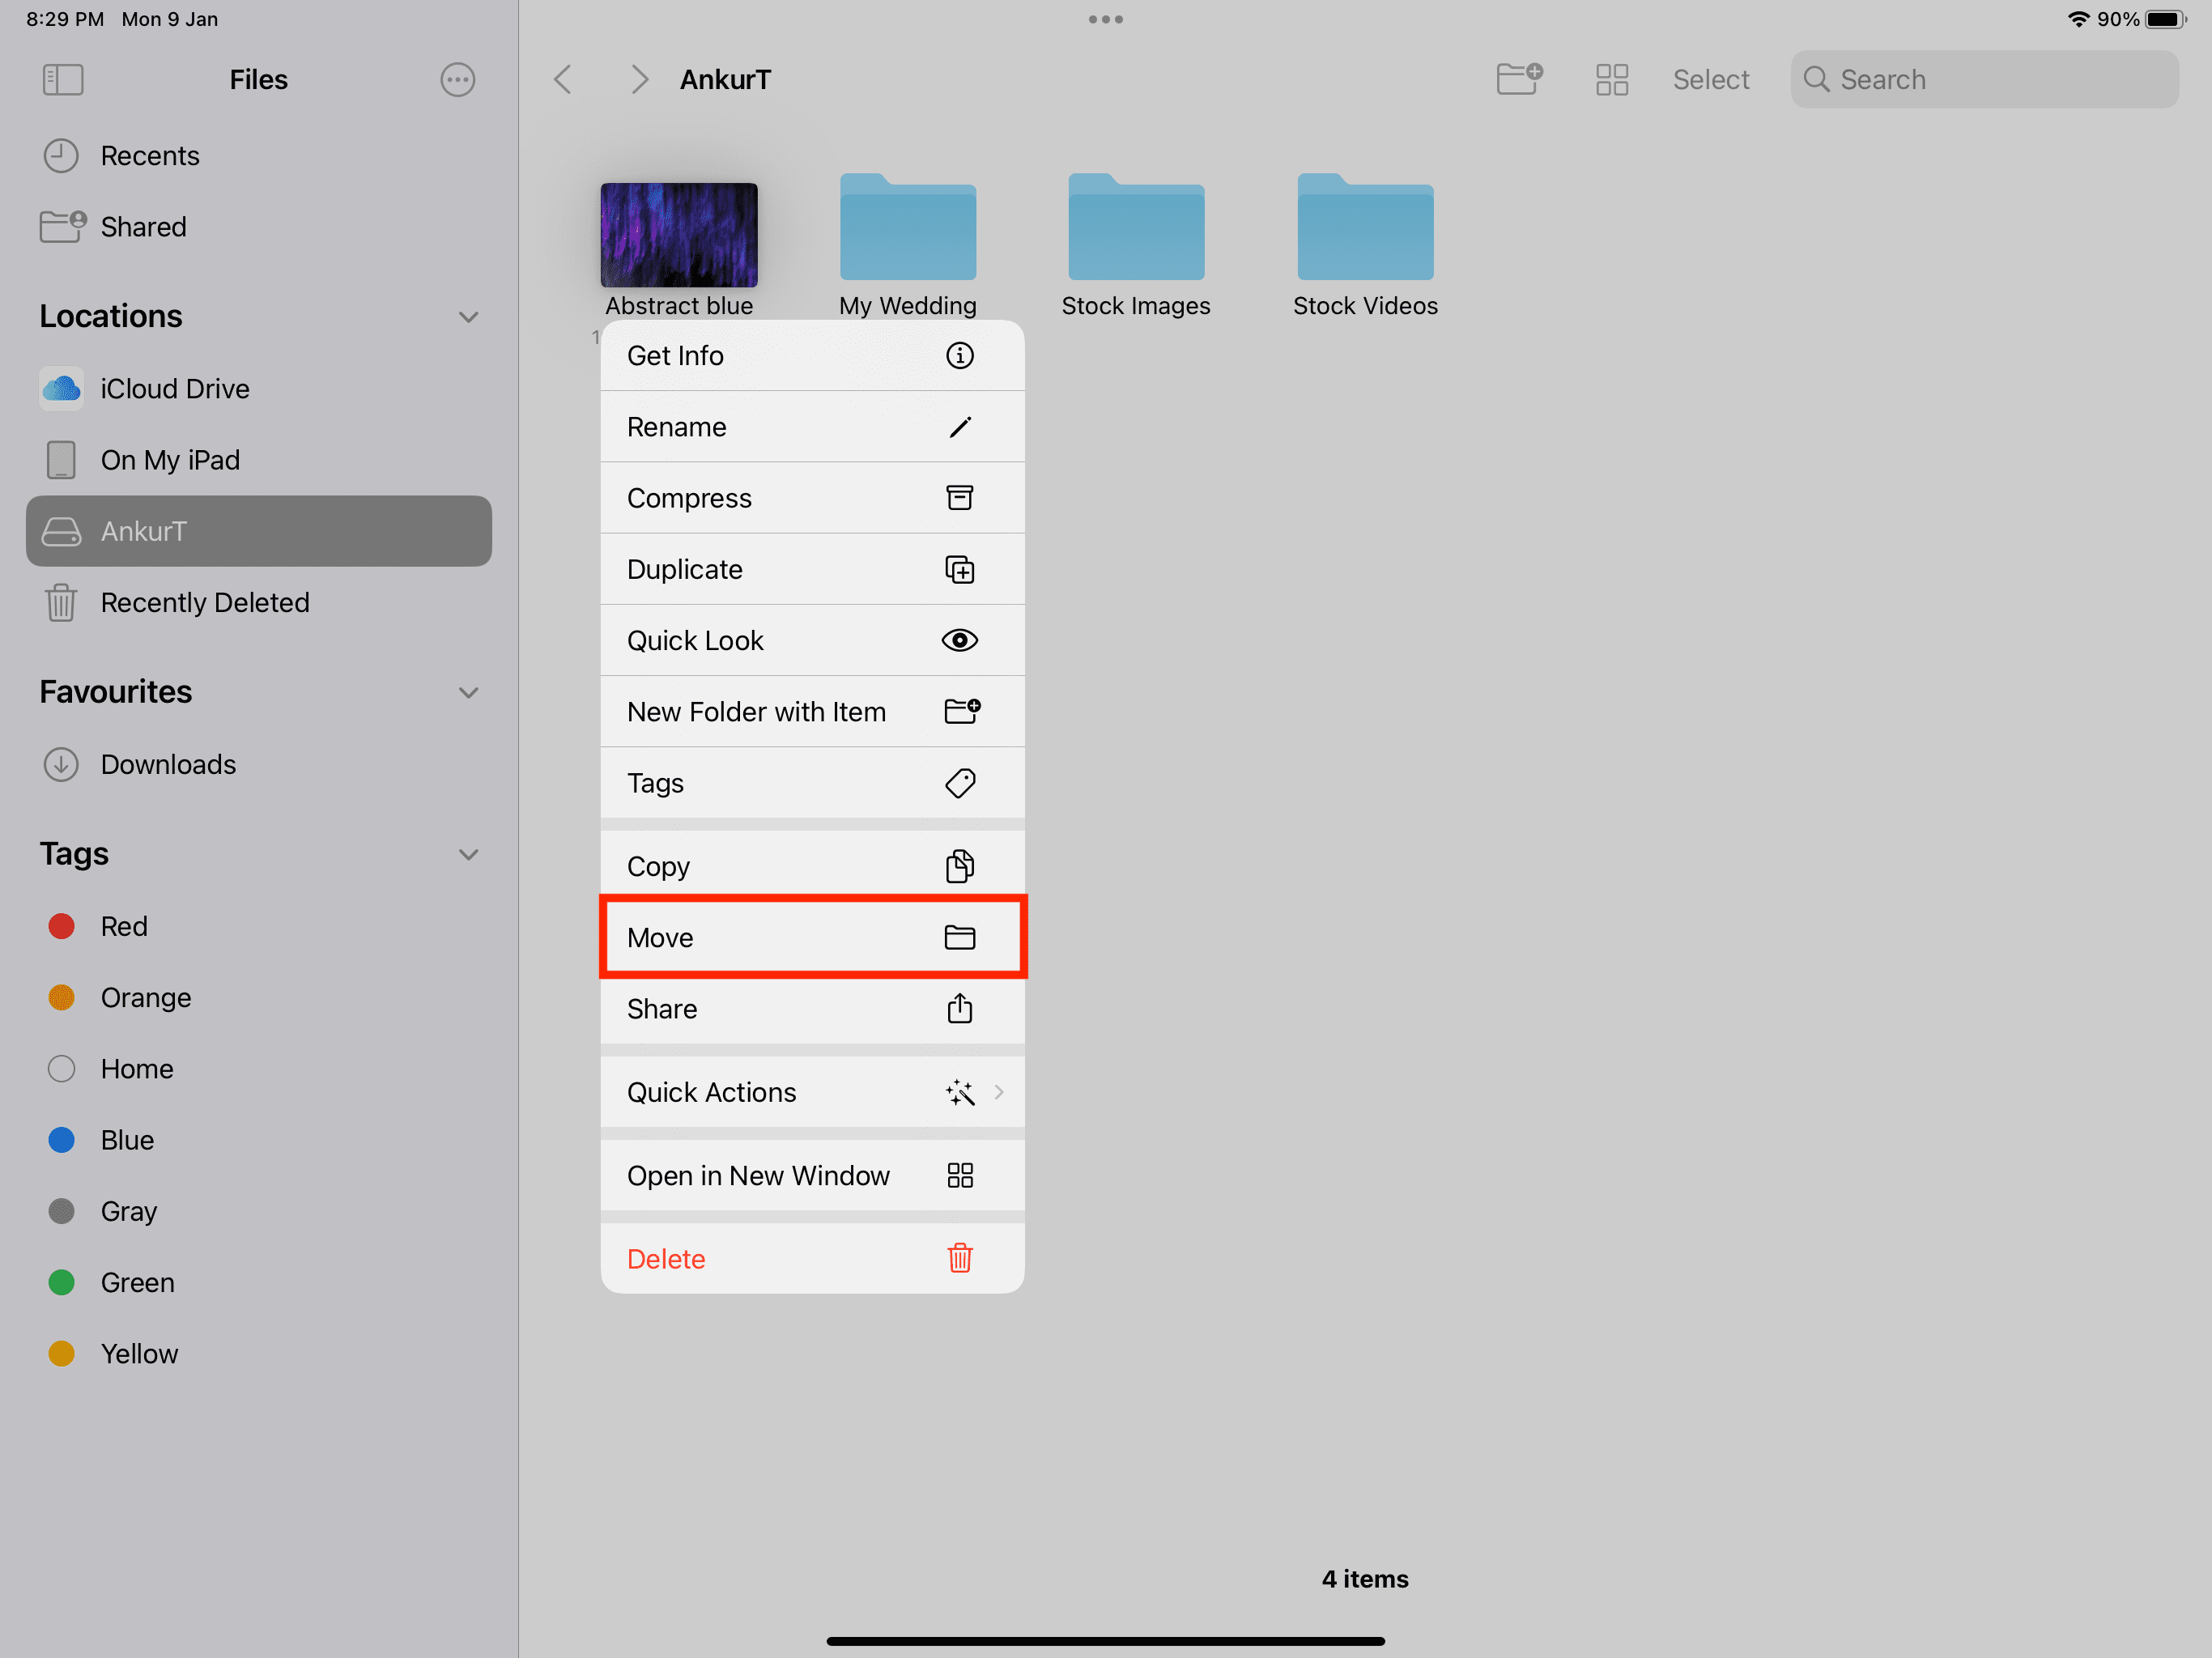
3) Touch as well as hold a file that will certainly raise a checklist of food selections. From below, faucet Move.
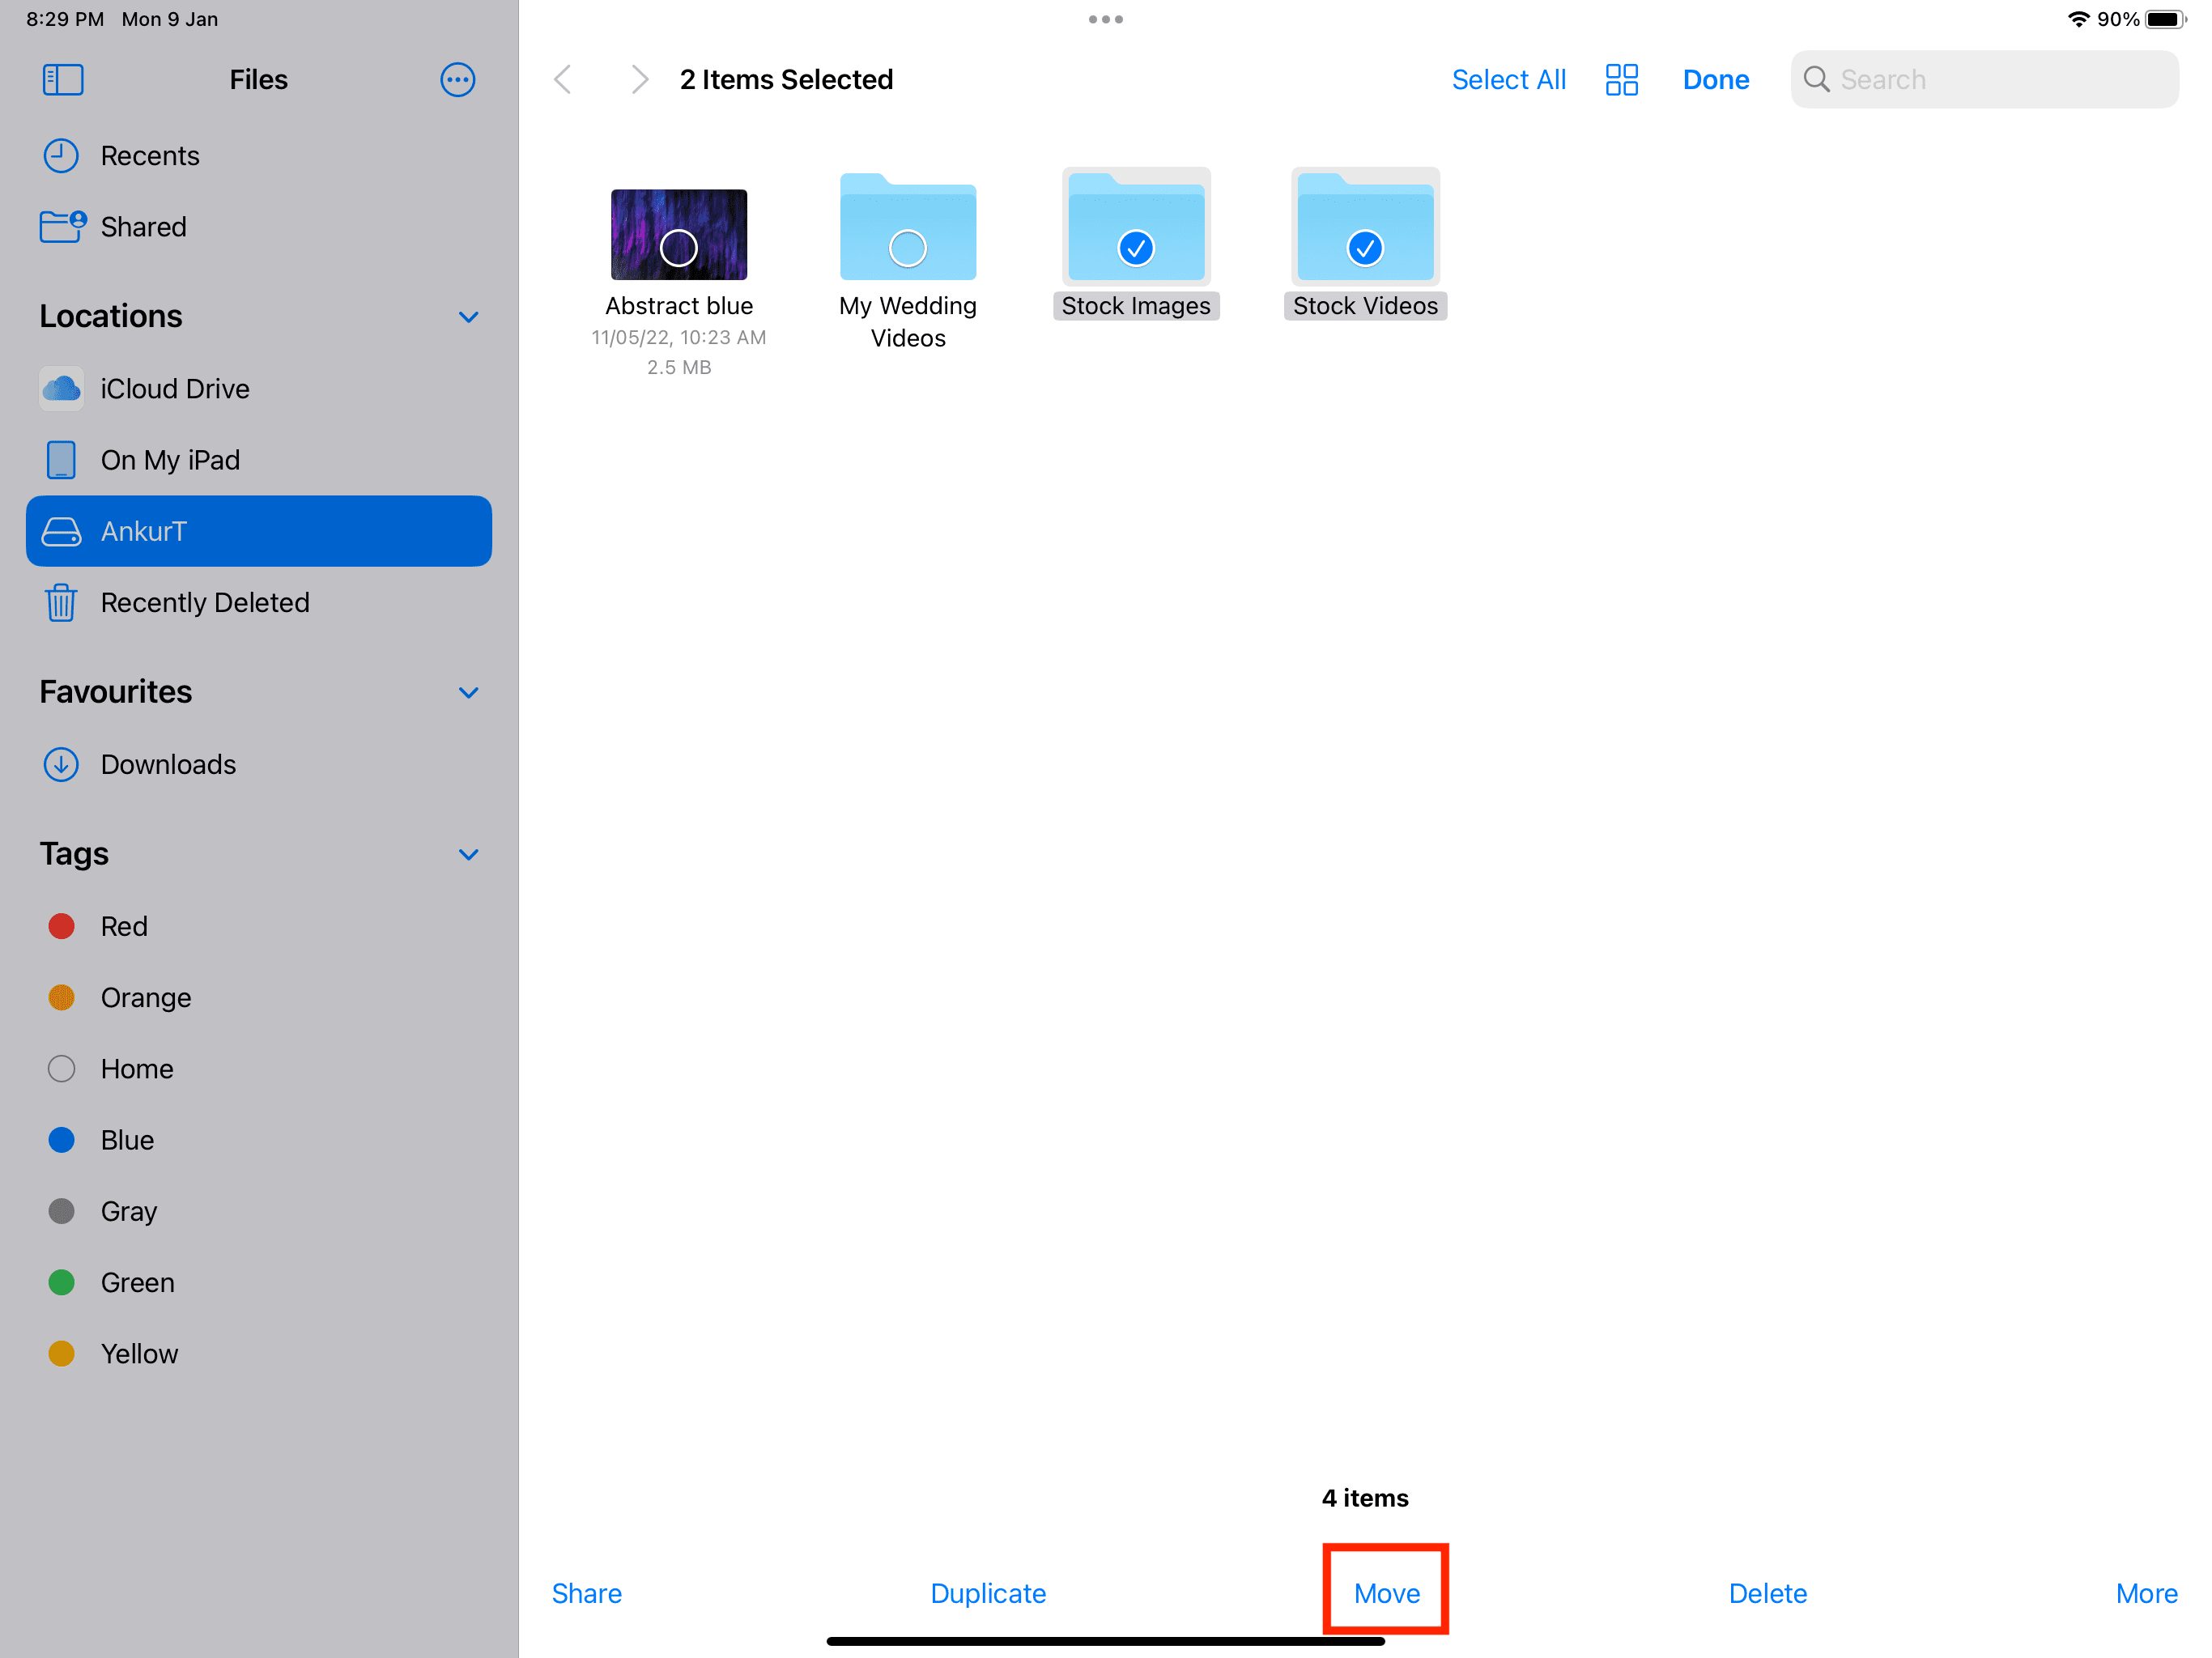
To duplicate several data at the same time, faucet Select as well as select the data. Currently, faucet Move.
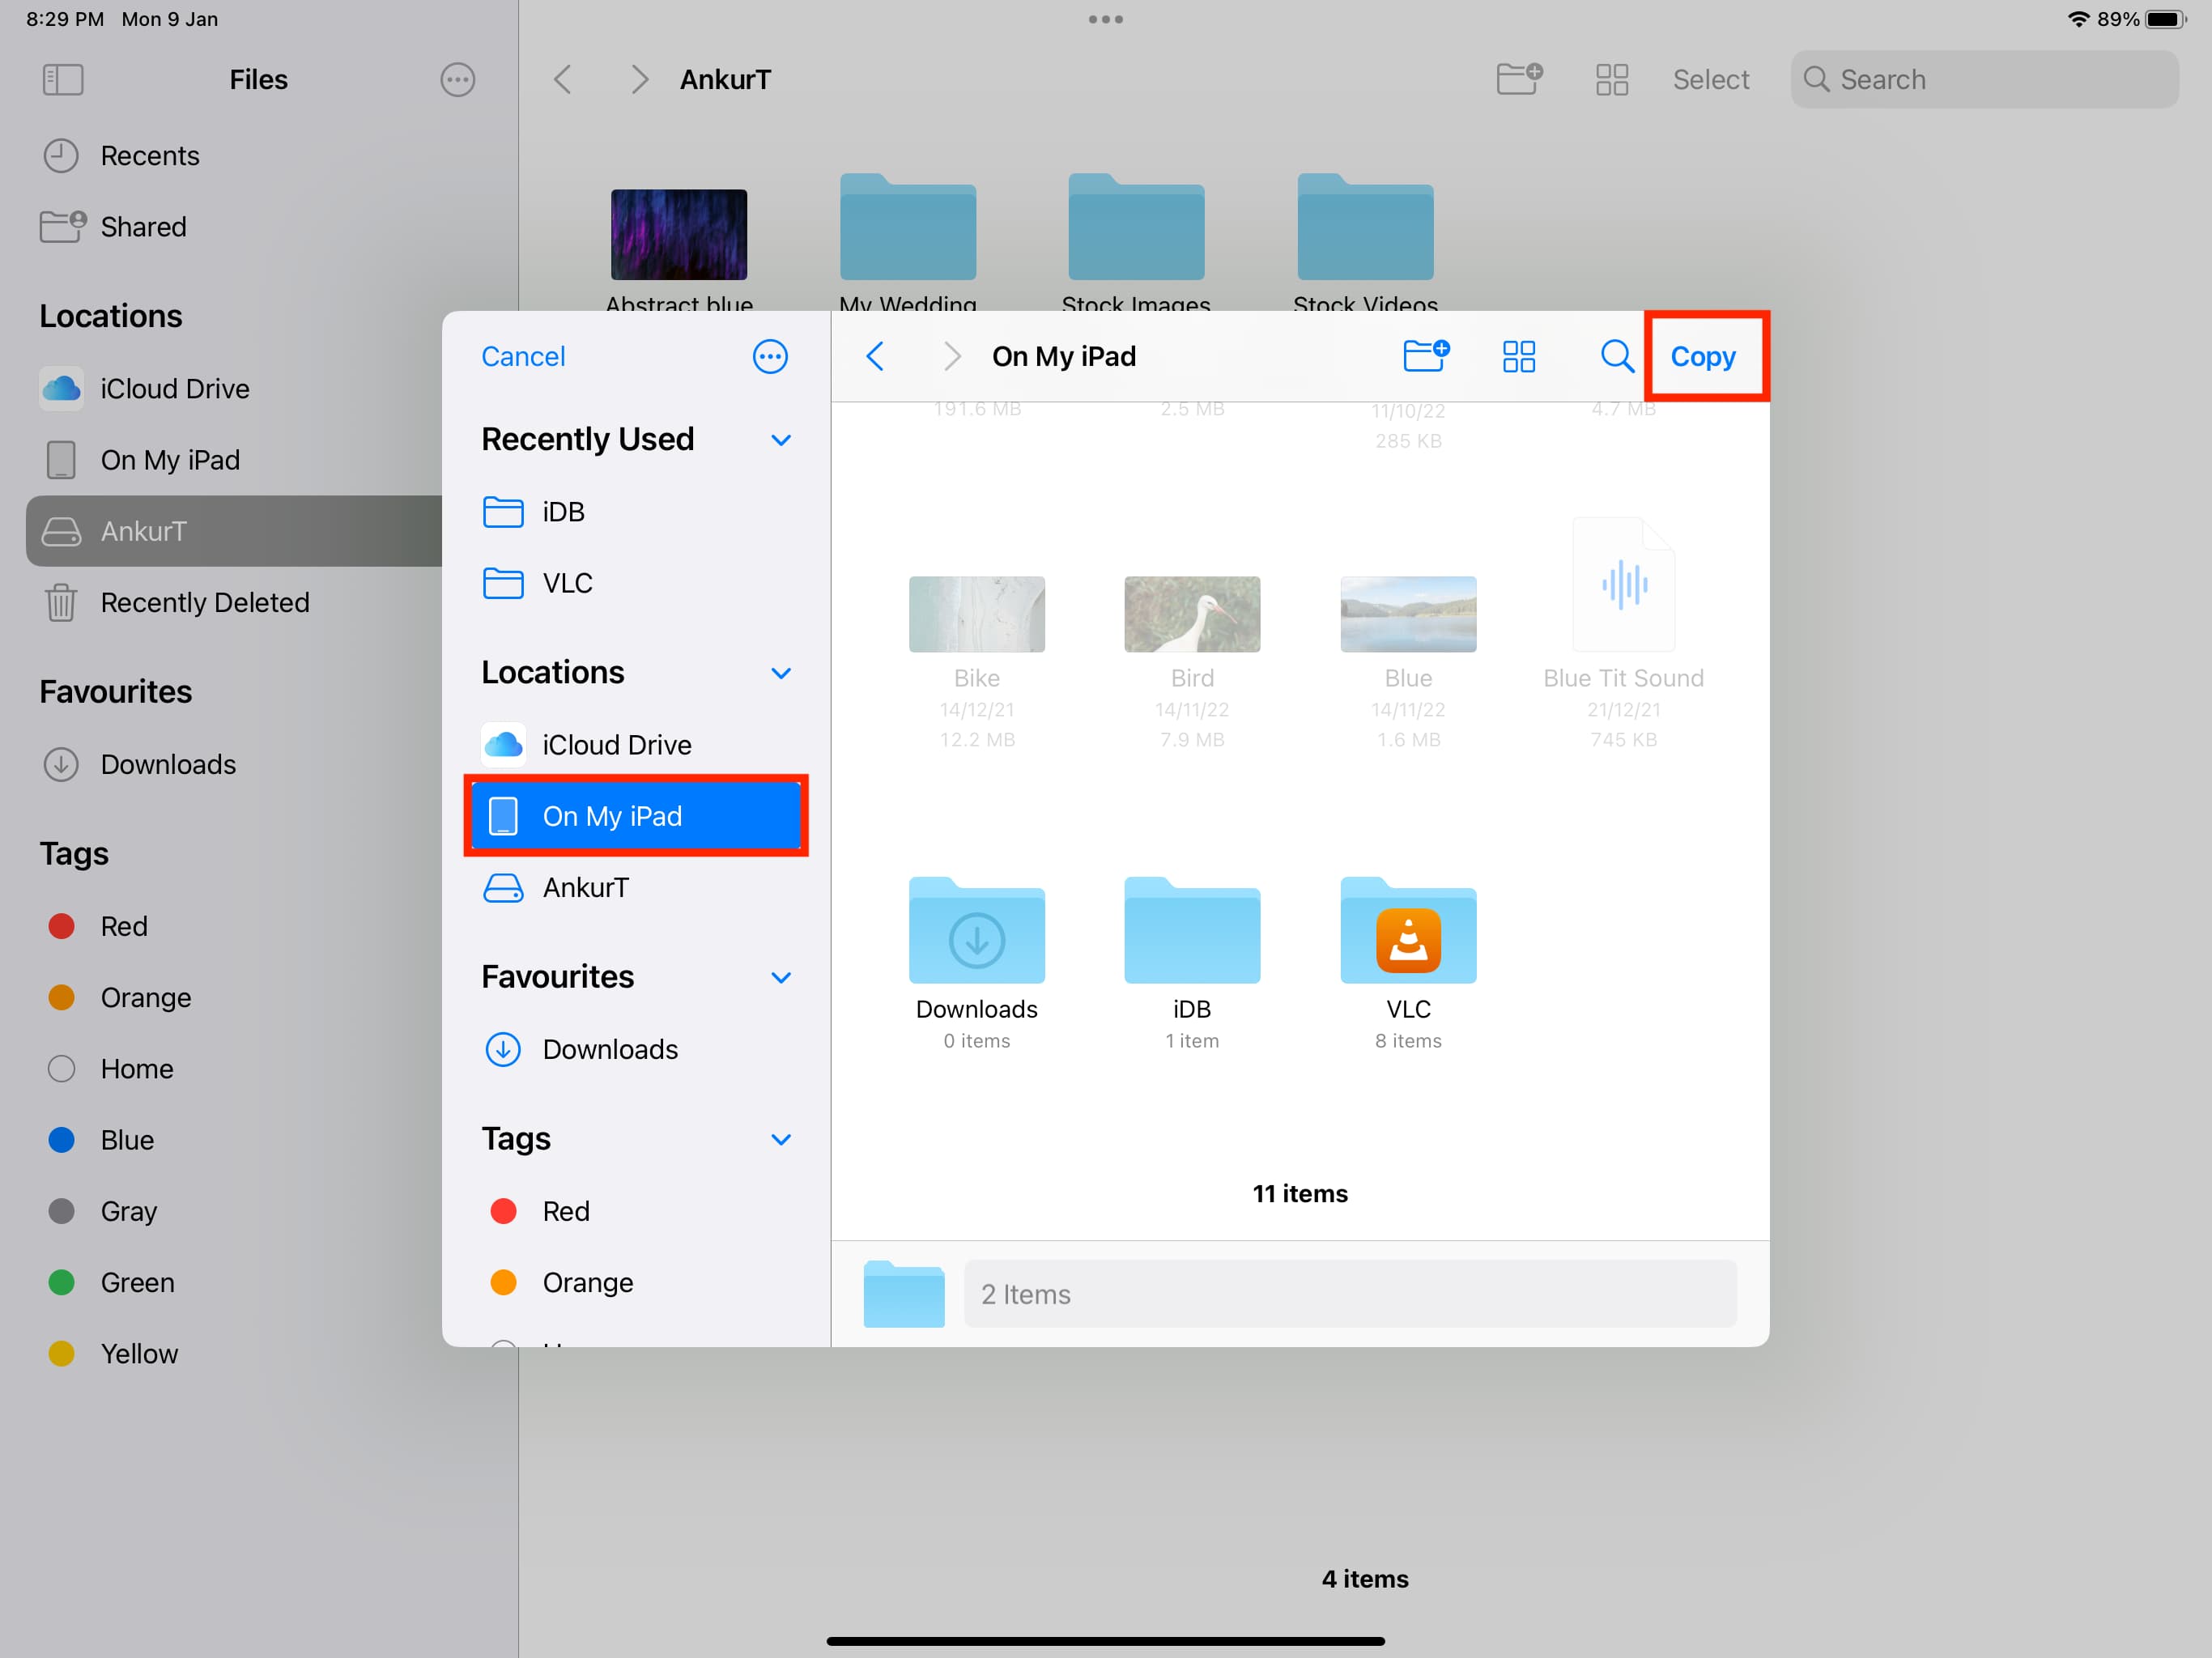
4) After touching Relocate, you’ll see a tv revealing all the Locations. Select On My iPad (this is your neighborhood offline iPad storage space) or iCloud Drive from the left side.
5) Ultimately, faucet Copy.
The iPad Data application will certainly duplicate the data from the outside drive to your neighborhood iPad storage space (if you chose On My iPad) or iCloud Drive.
Keep in mind: Whenever you’re duplicating data in between 2 various storage space (like an exterior drive as well as On My iPad), Move as well as Copy imply the exact same point. Simply put, selecting Relocate will certainly simply duplicate the data (as well as after duplicating, it will not remove them from the initial place). Nonetheless, Relocate will certainly do its real work if you relocate data from one folder of your drive to an additional folder on that particular exact same drive.
One more technique: Replicate & & paste
1) Open up the Documents application as well as choose your linked drive under Areas.
2) Faucet as well as hold over a data as well as select Copy.
For duplicating several data, faucet Select as well as select the data. Currently, faucet More as well as hit Copy N Items.
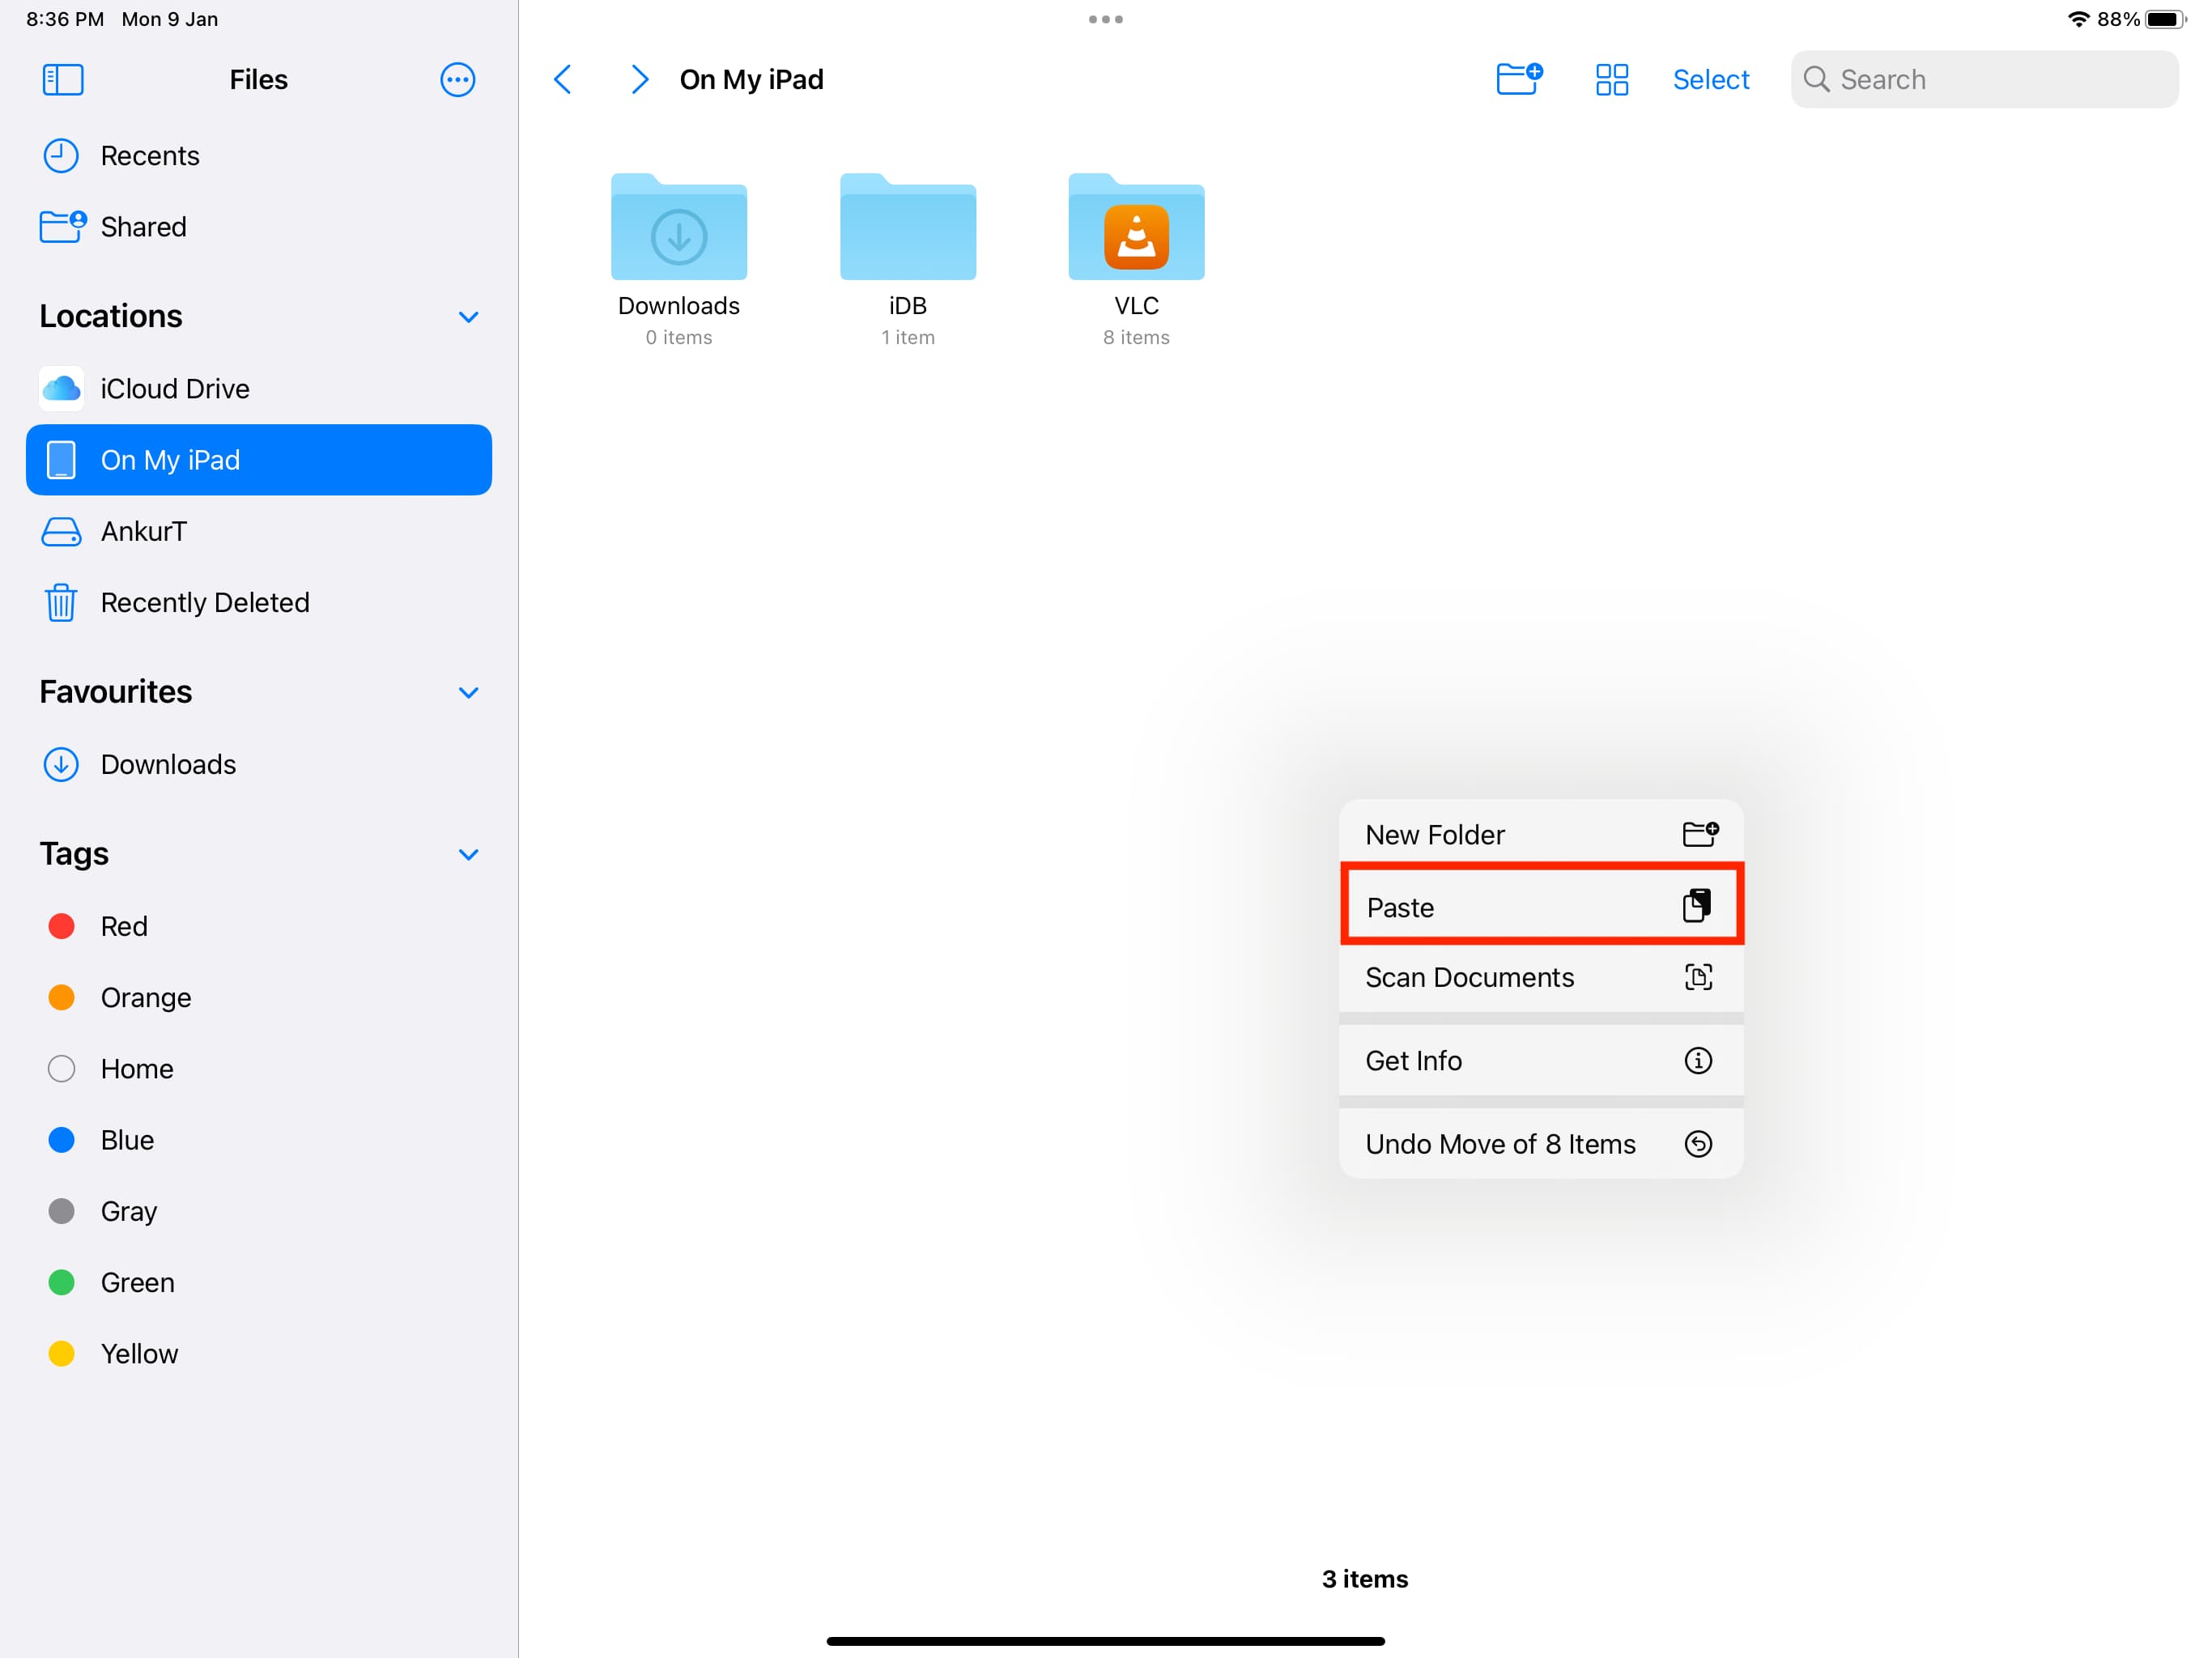
3) Select On My iPad or iCloud Drive from the left sidebar.
4) Touch as well as hold over a vacant location as well as faucet Paste.
One more technique: Drag & & drop
1) Open up the outside drive inside the Data application.
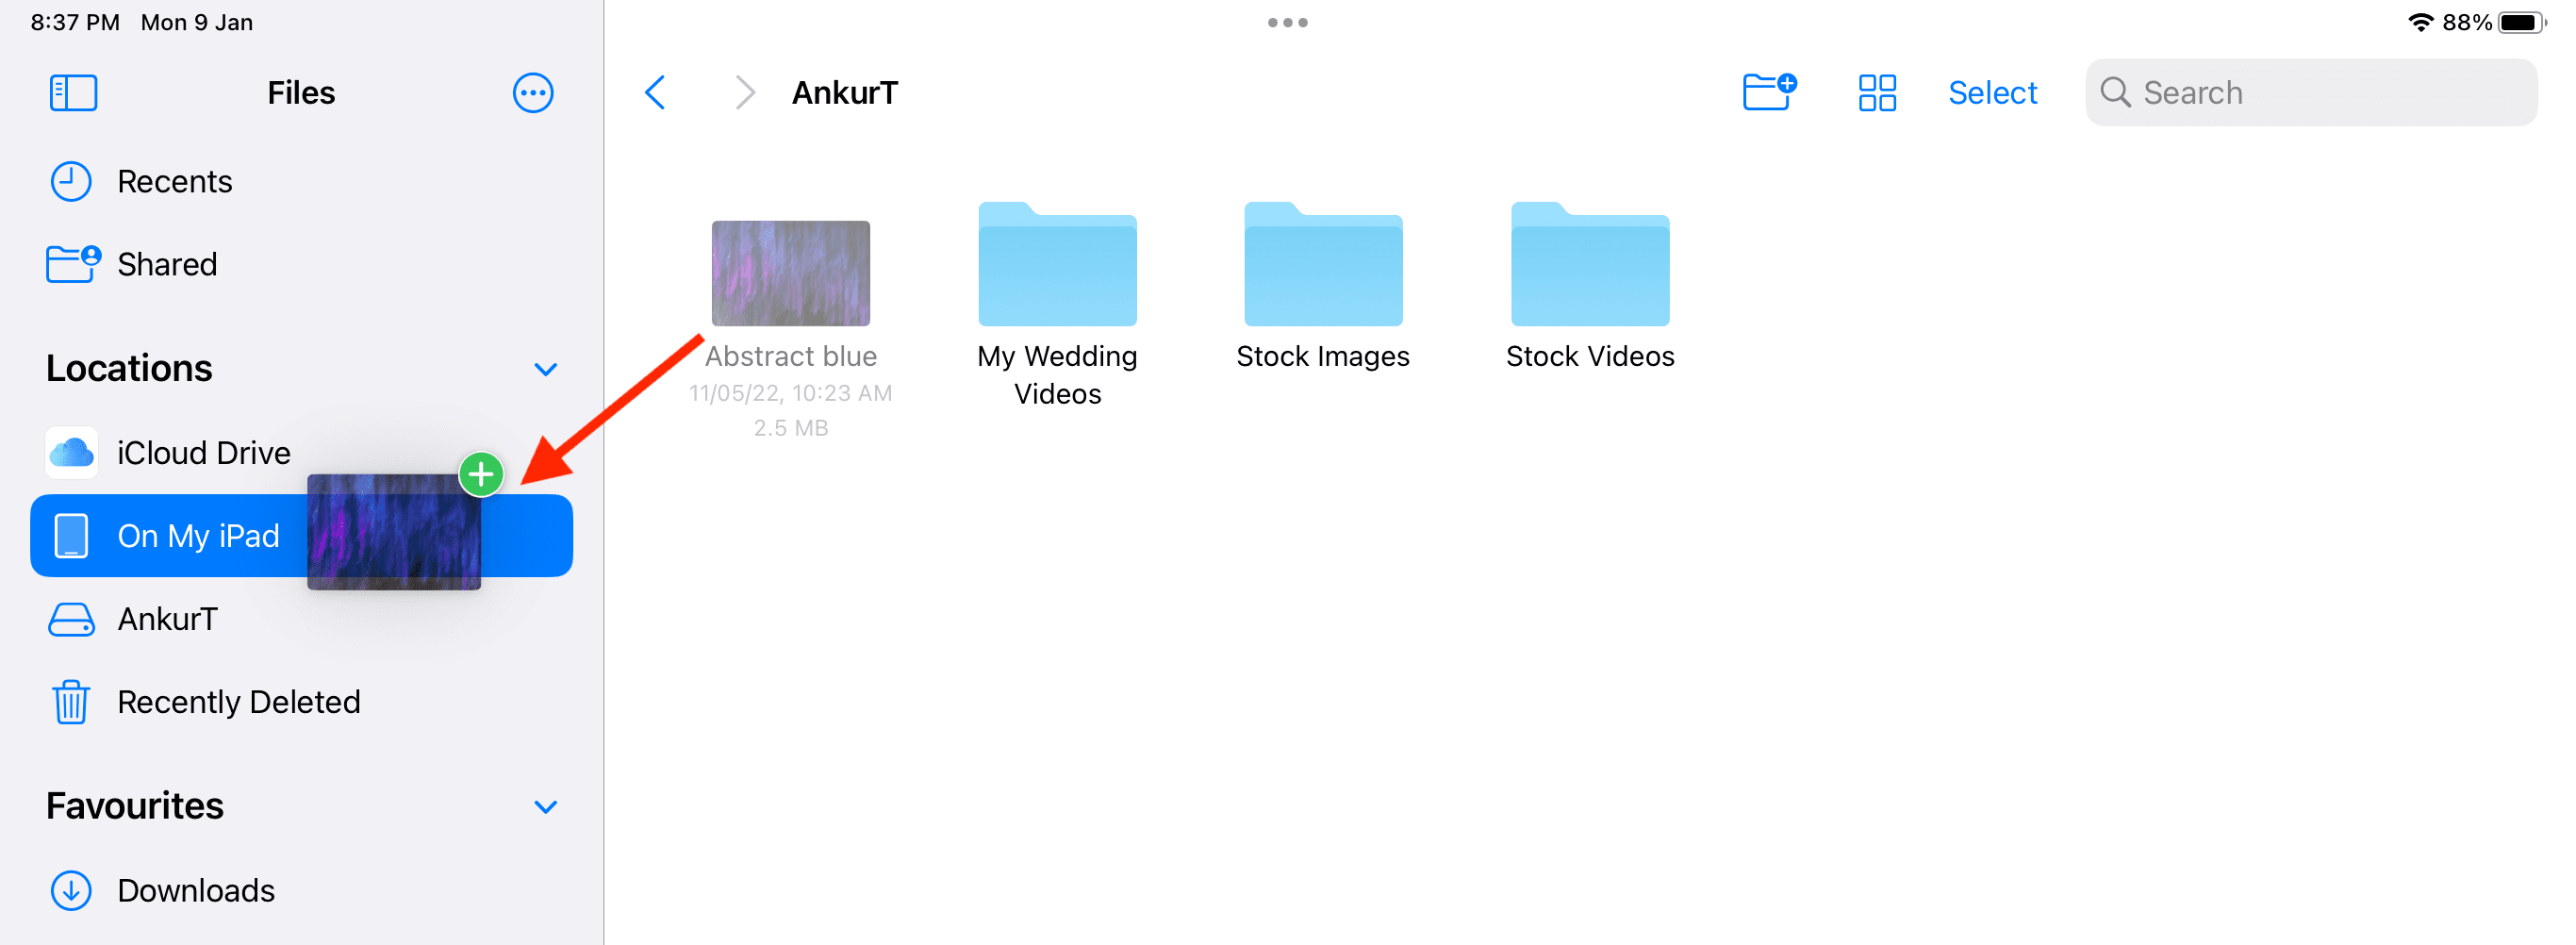
2) Touch & & hold a data and after that drag it over On My iPad or iCloud Drive that shows up in the left sidebar.
Obtain photos as well as video clips from a flash drive right into iPad’s Photos app
After you link a thumb drive, electronic camera, or SD card, you can see them in the Photos application as well as import photos straight there.
To do that, open up the Photos app > > faucet the sidebar icon, as well as you need to see a brand-new Devices heading that reveals the linked drive, gadget, electronic camera, or SD card. You might likewise see them in the Import area of the Photos application. From below, faucet Import All or choose the photos as well as faucet Import Selected.
Nonetheless, some outside drives will not show up inside the iPad’s Photos application also if they display in the Documents application. In this situation, you can duplicate the photos from the flash drive to your iPad’s Documents application (actions currently clarified over). Afterwards, faucet Select > > choose the pictures > > Share > > Save N Items. Currently, open up the Photos application, as well as you’ll see all these photos there.
Gain access to the flash drive in various other iPad apps
Besides Apple’s very own Documents application, you can likewise access your pen drive in various other applications that allow you see the Documents application inside it. One superb selection is the Documents application.
1) After attaching your outside drive to your iPad, open up the Files application.
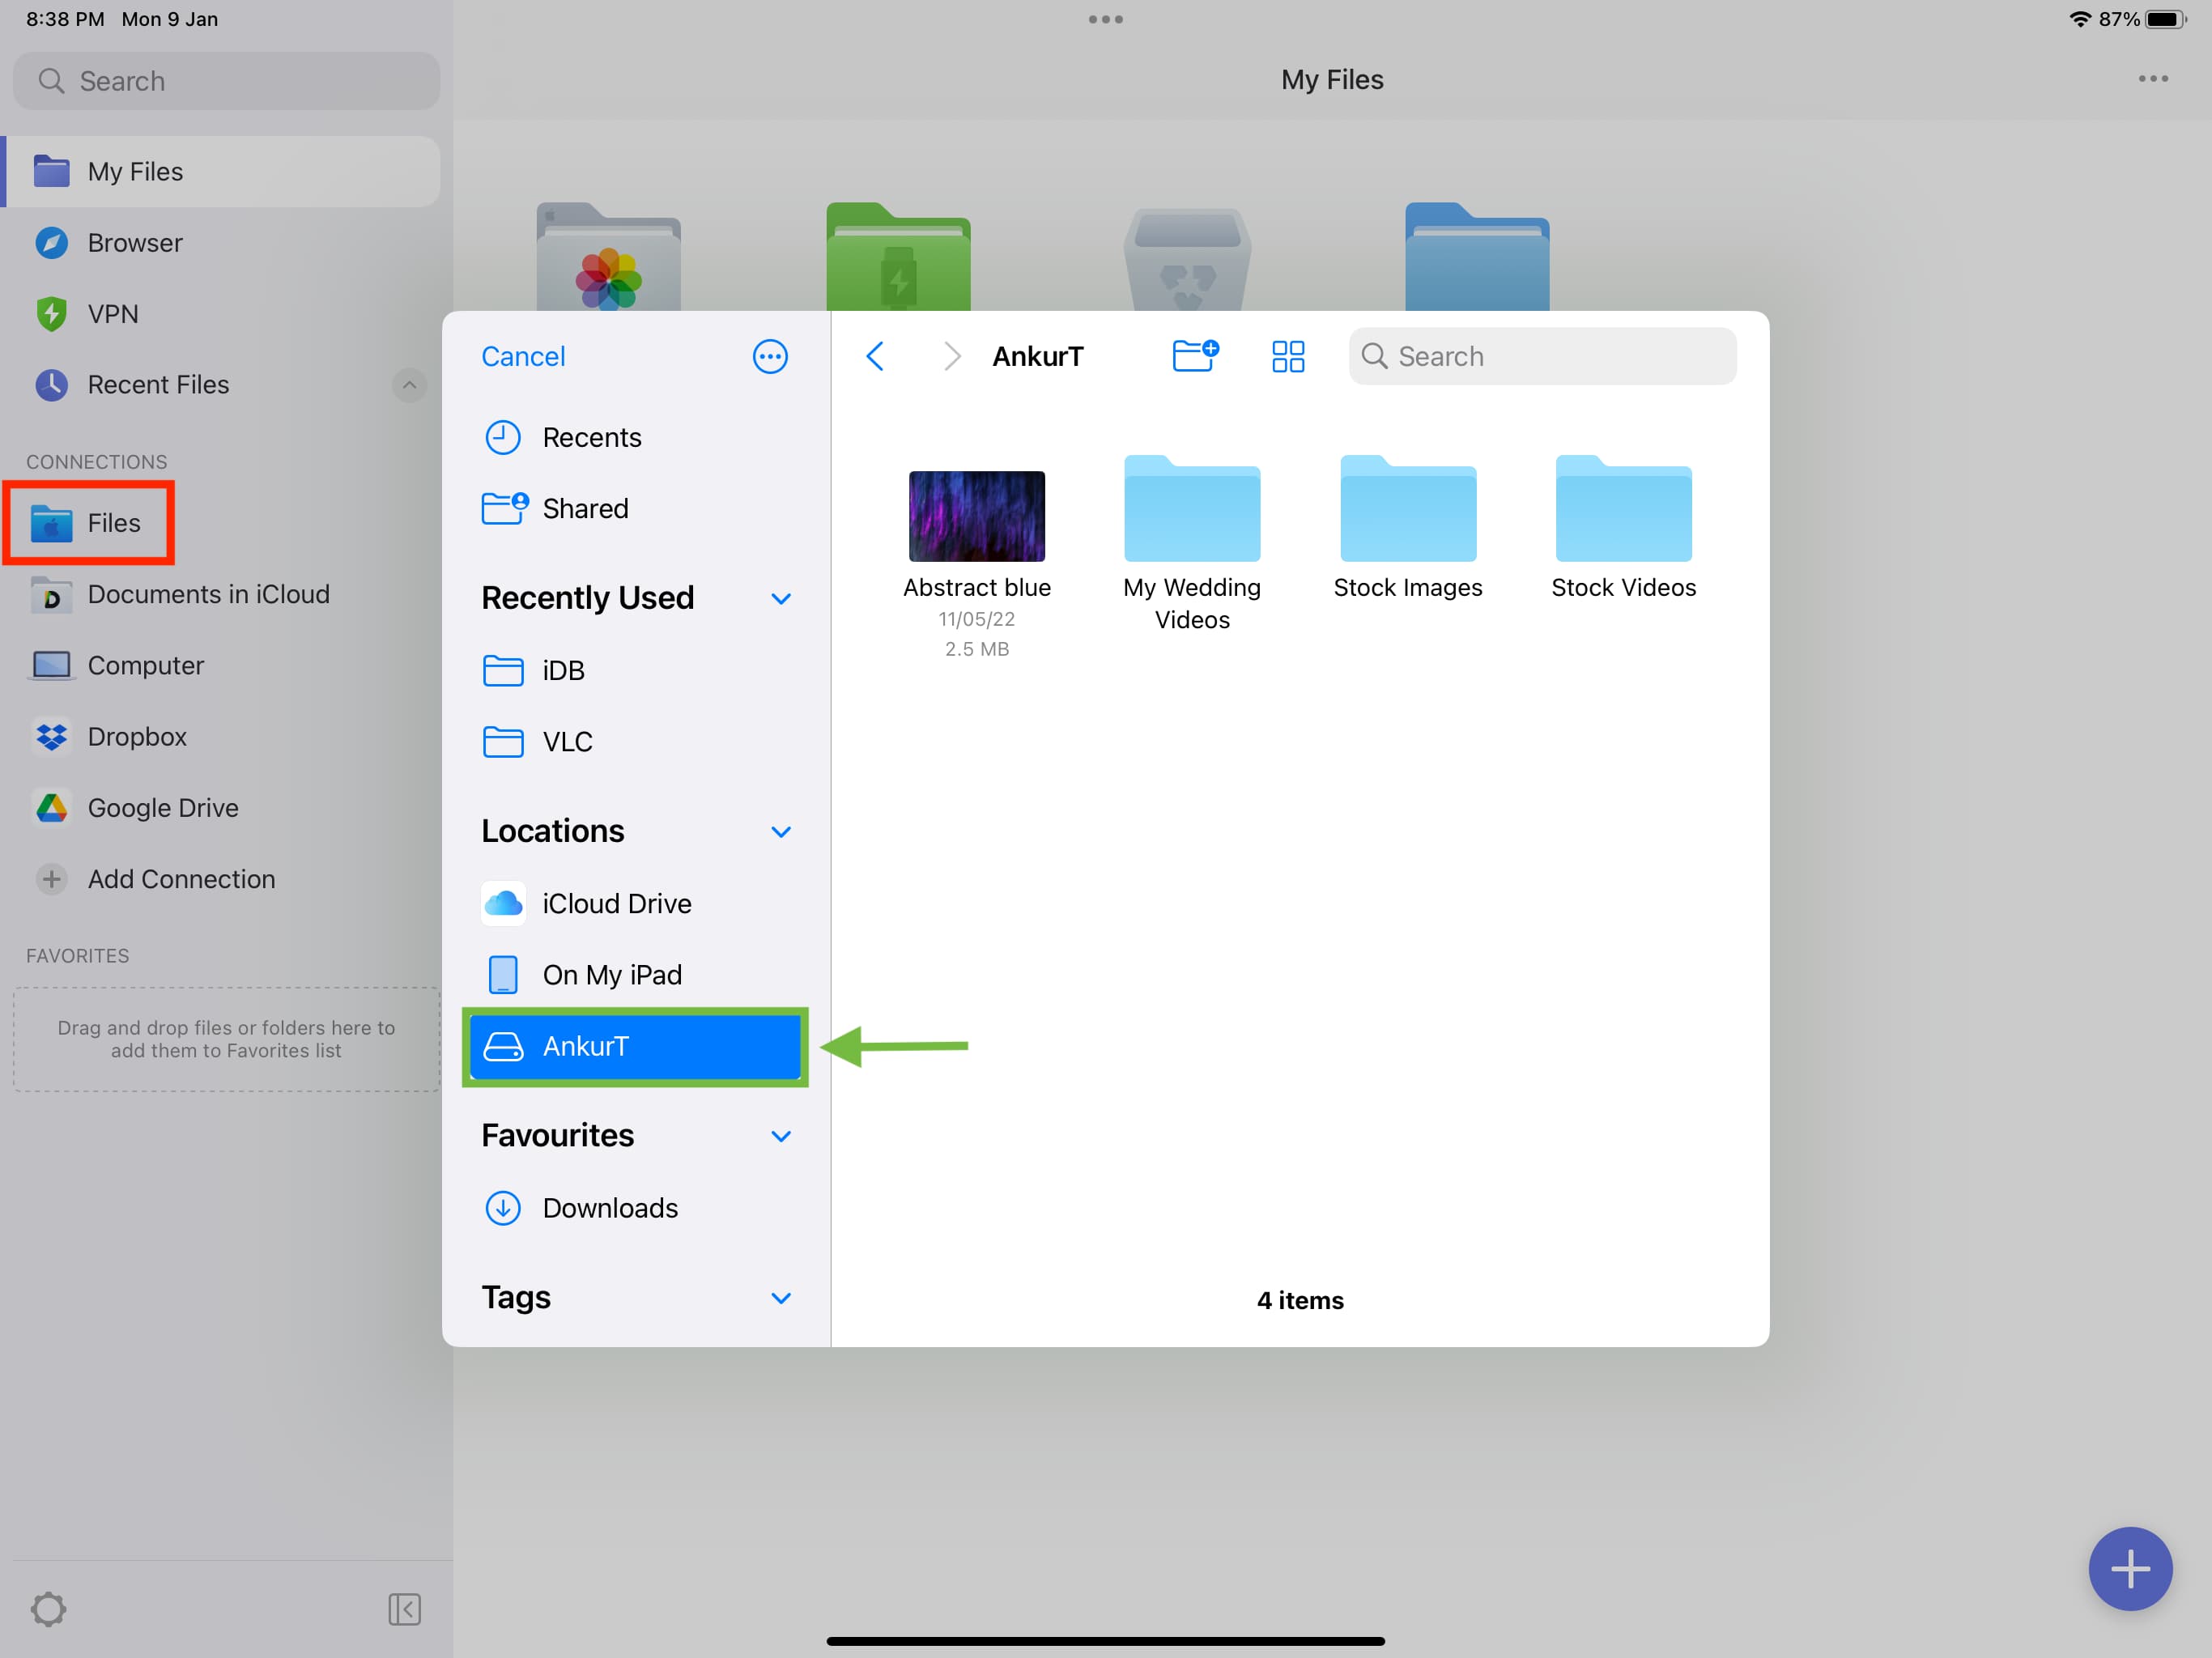
2) Tap Files under the Links heading. It will certainly open up the Documents application user interface. From below, choose your linked flash drive.
Produce a brand-new folder on the outside drive
1) Open your linked USB drive inside the iPad Data application.
2) Faucet the new folder button from the leading.
3) Provide your folder a name as well as faucet done on the key-board.
When you touch & & hold a data or folder, you’ll see the required alternatives to share, relocate, relabel, replicate, and so on
And you’ll see the exact same alternatives when you touch Select > > pick several files > > More.
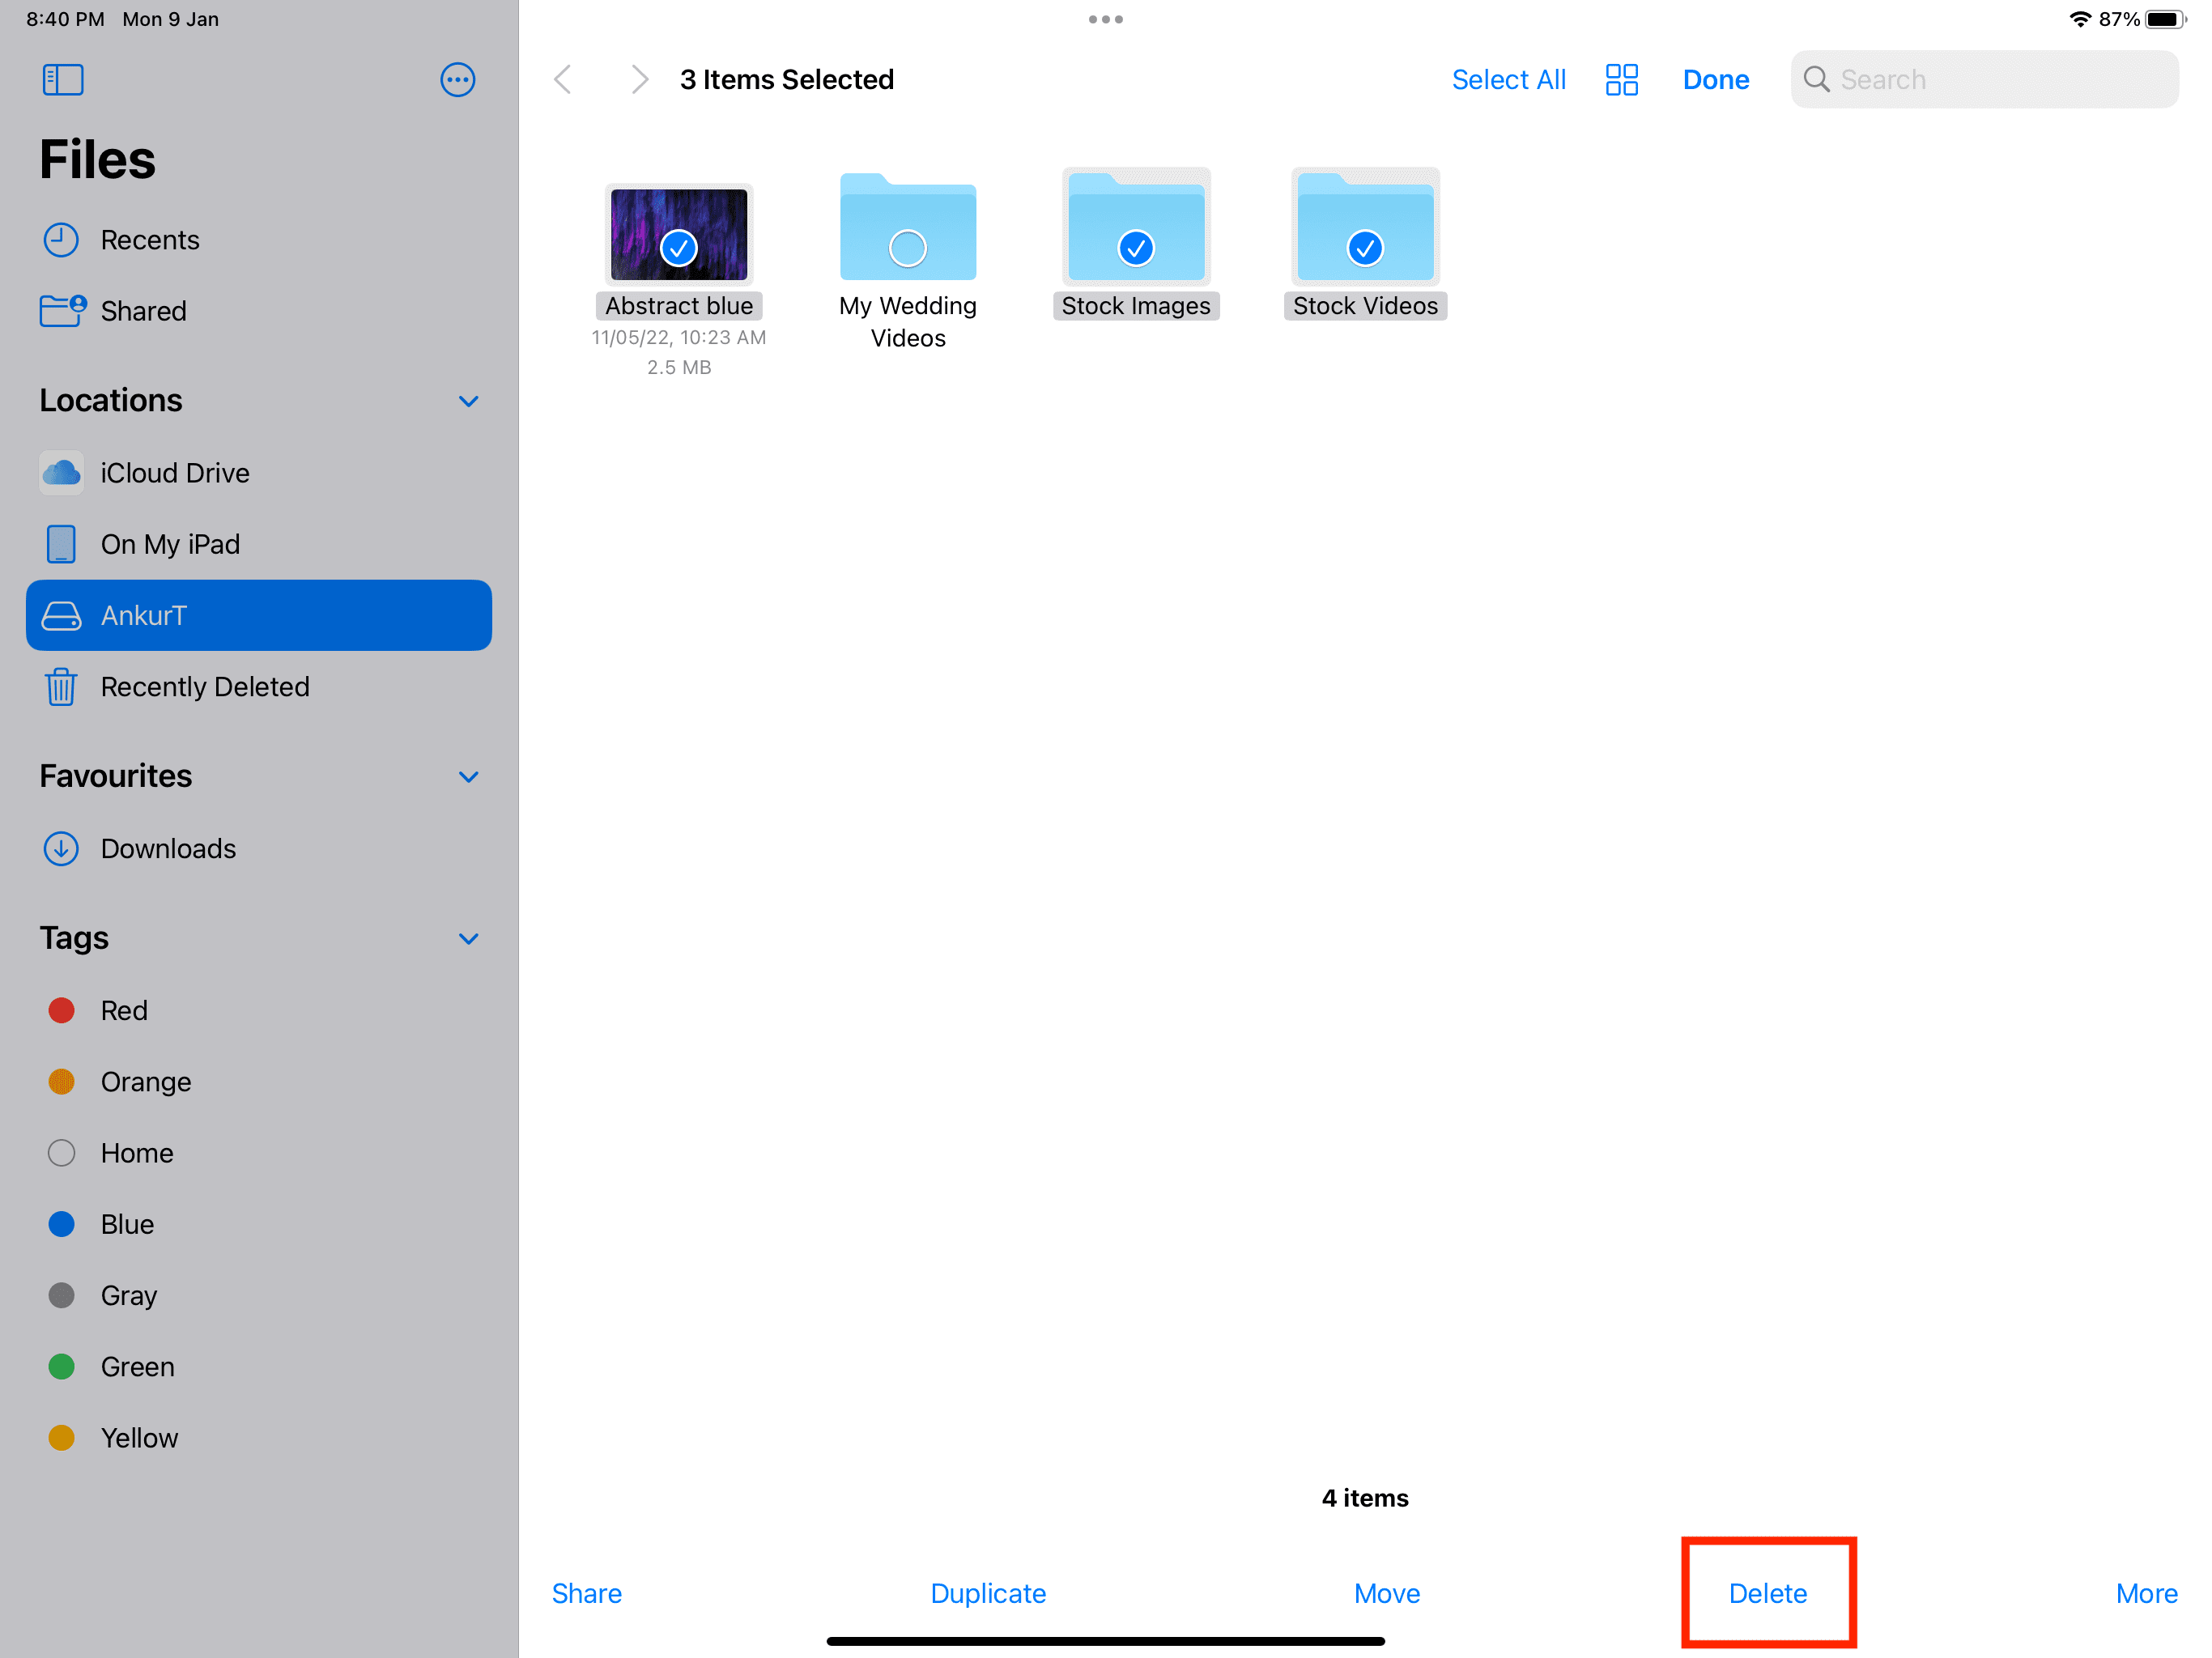
Remove data as well as folders on the outside drive
1) Select your linked drive from the left sidebar of the Data application.
2) Touch as well as hold a data or folder as well as struck Delete.
3) To do away with numerous data at the same time, faucet Select, pick the files, as well as touch Delete.
Eject the outside drive that’s linked to iPad
There is a correct choice on Mac to expel the linked outside drives. Nonetheless, on iPad, there is no such switch or symbol. You can merely disconnect the linked drive, as well as it’s securely expelled.
Devices recommendations
iPad family members of gadgets makes use of 2 type of adapters. More affordable (as well as older) gadgets such as iPad 9th generation utilize a Lightning port (the like your apple iphone), while mostly all various other more recent iPads utilize a USB-C adapter (like your MacBook or Android phones). And also the state-of-the-art current iPad Pro has a USB-C adapter with assistance for Thunderbolt/USB 4.
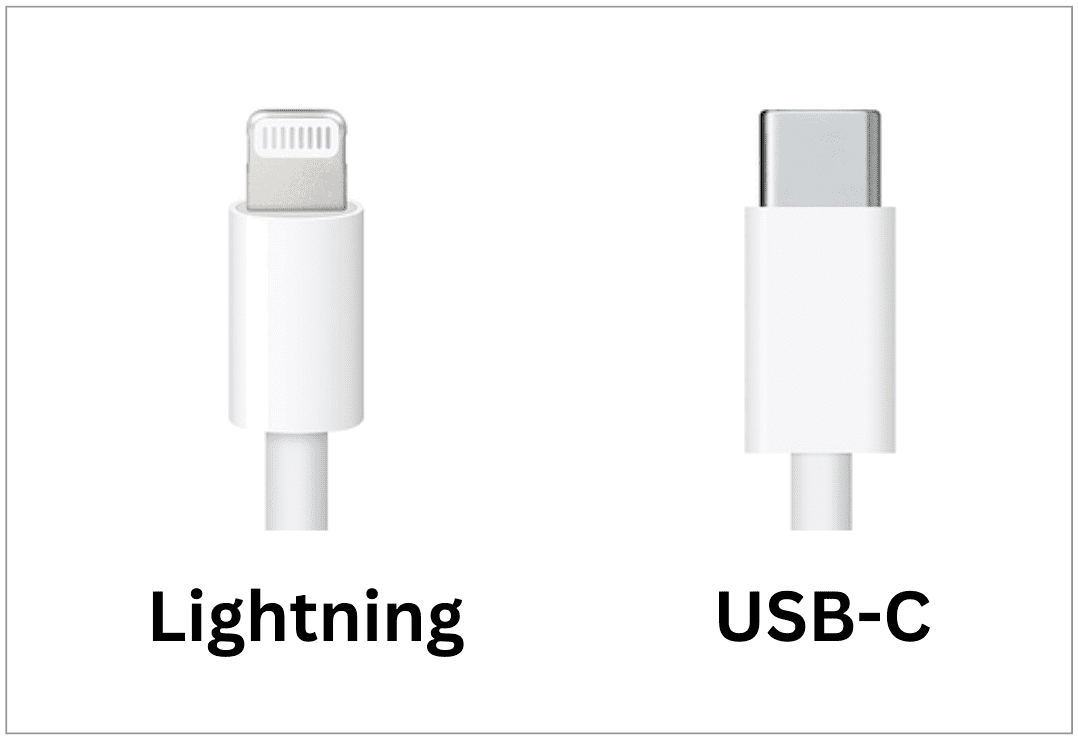
So figure out what connector your iPad has, as well as choose the ideal flash drive appropriately.
If your iPad has a USB-C port
You can utilize a thumb drive or SSD with a USB-C adapter. Below are a couple of alternatives:
If you intend to utilize your existing USB drives with the typical USB-An article, after that you will certainly require a USB-C center. Or, if, like me, you currently have a USB-C expansion that you utilize with your MacBook, after that you can utilize that with your iPad also.
If your iPad has a Lightning port
You can utilize a pen drive with a Lightning adapter. Below are some alternatives:
Or, you can obtain an expansion dongle with a Lightning port as well as link your existing drive with a USB-A port:
Flash drives with both Lightning as well as kind C adapters:
- JSL JDTDC (512 GB)
- iDiskk (Additionally has routine USB-A port)
- iDiskk ( Has USB-C, Lightning, USB-A, as well as Micro USB adapters)
Check out following:
.
